Professional hair and makeup is the prep decision that changes every frame of your boudoir shoot. The benefits of professional hair and makeup in boudoir photography are practical rather than cosmetic: an artist who works in front of studio strobes builds a face that holds up under flash, survives an afternoon of outfit changes, and needs far less retouching afterward. Makeup that looks perfect in your bathroom mirror can read flat, shiny, or strangely pale the moment a strobe fires at it.
None of this is about fixing anything. You already look like you. The job of a photography-trained artist is to stop the camera from losing what your own eye already sees, because a sensor throws away texture, dimension, and color that a person standing three feet away picks up without thinking.
What Studio Flash Does to Everyday Makeup
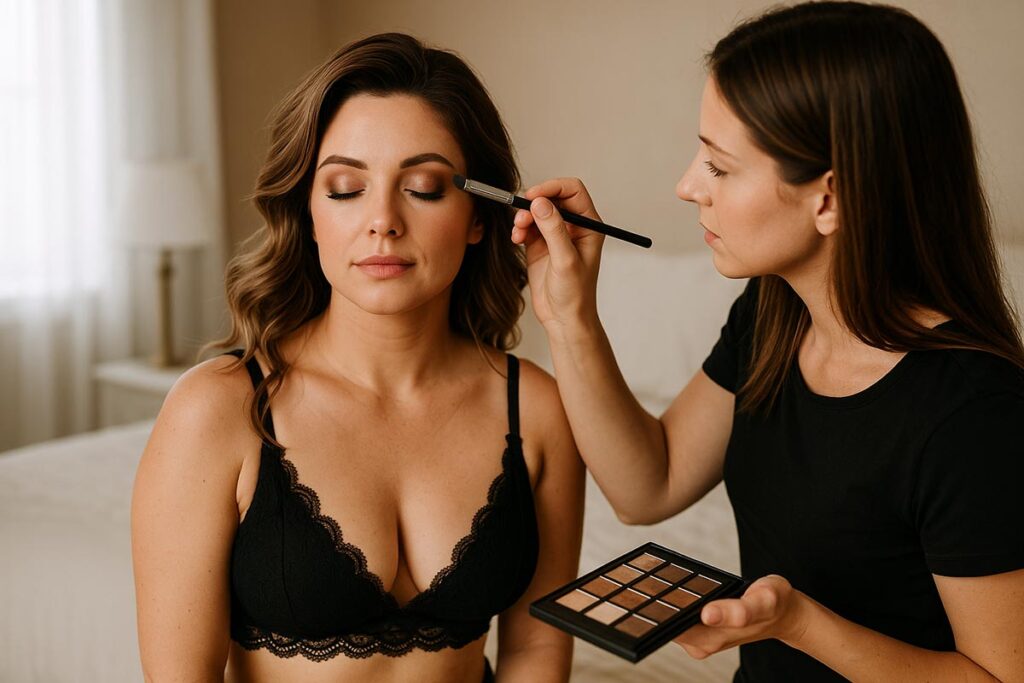
Studio flash is a hard, near-colorless burst that flattens dimension and washes out anything applied at everyday weight. Contour, blush, and brow work that read as subtle in daylight can simply vanish. A professional makeup artist who works boudoir sessions applies more product than you would wear to dinner, and places it differently.
Two categories of product cause visible, unfixable problems. The first is SPF. Titanium dioxide and zinc oxide, the mineral filters in most sunscreens and in plenty of tinted moisturizers, primers, and BB creams, reflect flash straight back at the lens and leave a pale grey cast across the face. Photographers call it flashback. The second is heavy silica-based setting powder, which does much the same thing across the nose and forehead.
One thing we ask every client to skip on the day of a boudoir shoot is anything containing SPF, including tinted moisturizer and primer, because the mineral filters that block UV also bounce studio light. Flashback never shows up in the mirror. It shows up on the file, after the session is over.
Finish is the other lever. Satin and matte bases photograph cleanly, while a fully dewy base turns into specular hot spots on the forehead, nose, and chin. Your skin should still look like skin, so a professional puts highlighter on in a narrow line along the cheekbone rather than sweeping it across half the face.
Airbrush or Traditional Foundation on Camera?
Airbrush foundation is silicone or water-based product delivered as a fine mist through a compressed-air gun and built in thin layers. It sits in an even film, resists transfer onto robes and sheets, and holds its wear time better than most cream bases. The trade-offs are real. It is harder to spot-correct once set, it can emphasize dry patches and raised texture instead of smoothing them, and applied too heavily it goes flat and mask-like under flash.
Traditional application with a brush or damp sponge gives the artist more control. It layers where you want coverage, stays sheer where you do not, blends into your own skin texture, and touches up easily between looks. The cost is transfer, since cream and liquid bases move onto fabric, so a setting step is not optional.
If your skin is dry, textured, or mature, traditional application usually photographs better. If you sweat easily, you are shooting many wardrobe changes, or you want the longest wear possible, airbrush is the safer pick.
Lashes, Eye Shape, and What the Lens Actually Sees
Mascara alone tends to disappear under flash, which is why nearly every artist reaches for lashes. Weight is what separates a good result from a tired one. A dense strip band on a hooded or mature lid physically pushes the lid down, and the camera records that as a half-closed, heavy eye even when it feels fine in the chair.
Individual or cluster lashes solve most of this. They add density along the lash line without the weight of a full band, and they let the artist taper the effect toward the inner corner so the eye stays open. Ask for them if your lids are hooded, if your eyes are close-set, or if you already know strip lashes feel heavy on you.
Lash choice matters more here than in most portrait work. Many of the strongest boudoir photos involve a downward gaze or closed eyes shot from the side, which puts the lash band in full profile. A strip that lifts at the outer corner or shows a hard edge is obvious in that frame and invisible in a straight-on headshot.
Longevity: What Has to Survive a Whole Boudoir Session
Lip product fails first. Creamy lipstick transfers onto fabric, hands, and teeth within minutes, which is a problem when you are pulling garments over your head between looks. Long-wear liquid formulas survive everything but can flatten the lip and settle into lines under a bright key light. The middle path most artists use is a lined lip with a satin lipstick, blotted, re-pressed, then set, with the tube left beside the mirror so it can be refreshed between outfits.
Hair frames the face and carries much of a photo’s mood, and it fails differently. It does not smudge, it drops. A set that has been fully dried, cooled, brushed out, and re-pinned holds for hours, while one built stiff with spray straight off the iron looks great for twenty minutes and then separates under warm modeling lights and movement. Day-old hair takes and keeps a set better than freshly washed hair, so wash the night before rather than the morning of.
How the day usually runs
Hair and makeup come first, in the makeup room at our Northeast Minneapolis studio, before anything gets photographed. Styling finishes, you change into your first look, and the artist stays available for touch-ups between outfits. That quiet hour at the start does something no product can: it lets you arrive stressed and start shooting settled. Our guide to preparing for your first session covers the rest of the timeline.
How Professional Makeup Cuts Your Retouching Time
This is the benefit nobody mentions. Retouching removes a blemish, a stray hair, or a bra strap in seconds. What it cannot do cleanly is rebuild skin underneath a problem: foundation gone cakey, powder settled into fine lines, a hard foundation line along the jaw, or a grey SPF cast across the whole face. Those need frequency separation work, image by image, and the result often reads plastic because real skin texture had to be sacrificed to fix the coverage.
A well-applied base keeps the edits light, brings the files back sooner, and leaves your skin looking like skin. The artists we work with say the same thing constantly: the goal is not to change your face, it is to keep the camera from flattening it.
How to Tell Your Hair and Makeup Artist What You Want
Most people book a boudoir session with inspiration photos of someone else. Bring those, then bring a second set that is far more useful: photos of yourself on a day you felt genuinely good. Those show what actually suits your features, coloring, and comfort level, instead of what suited a stranger with different bone structure.
Describe the look with four words the artist already uses:
- Coverage. Sheer, medium, or full. This decides how much of your own skin shows through.
- Finish. Matte, satin, or soft glow. Satin is the safe default under studio light.
- Intensity. Soft and diffused, or defined with a strong eye or lip. Say which one carries the look.
- Lip. Nude, your own color enhanced, or a real red. Reds photograph beautifully and they stain, so decide early.
Say what you do not want, too. “Don’t touch my brow shape,” “no heavy contour,” and “I never wear a strong lip” are the three most useful sentences you can offer. Mention sensitive skin, any reaction you have had to lash adhesive, and whether you wear contacts, since that changes how an artist works around the eye.
Doing Your Own Boudoir Hair and Makeup: When It Works
It can absolutely work. If you already apply a heavier hand than daily wear, you know your skin, and you can keep SPF, silica powder, and shimmer out of the equation, you will be fine. Plenty of people prefer the control.
The usual failure is not skill, it is calibration. Everyday coverage that looks polished in the mirror photographs as bare under flash, and shimmer that reads as a soft glow in person turns into hard specular spots on camera. The second cost is quieter. Doing your own face means you show up already switched on, and you spend the opening stretch of the shoot checking your reflection instead of settling in. There is no wrong answer, only a trade you should make on purpose.
Where Professional Hair and Makeup Fits in Your Boudoir Prep
Styling is one piece of a larger prep list, and each of these has its own guide:
- Not sure what the day involves? Start with what a session includes.
- Your makeup intensity should match your comfort level, so settle where you land between elegant and risque before you sit in the chair.
- Wardrobe drives your lip and base choices, and where to shop for outfits in Minneapolis walks through the options.
- Hair length and volume affect which poses work, which the guide to flattering poses for every body type gets into.
- Ask about the styling team when choosing a photographer in the Twin Cities, because not every studio includes one.
- The studio itself on E Hennepin Avenue has a dedicated makeup room, so you get ready on site instead of driving across town already done.
Book the session first, ask what the styling arrangement is, then plan wardrobe around the look you have agreed on. That order keeps you from buying a red lip for a shoot that turns out soft and natural. The benefits of professional hair and makeup in boudoir photography show up in every frame you keep, so bring your questions to the consultation and let us plan it with you at our Minneapolis boudoir photographer studio.